
Energy Monitoring Part Two

I can finally see everything on one screen. Glorious.
When we last left off, I’d completed Phase One of my multi-part plan to properly monitor my household energy from a single platform. This time around it is Phase Two, where I cover some interesting changes that include drilling a hole in the side of the house and some coding.
The APsystems ECU-3
The APsystems ECU-3 is what my original 22 solar panels are monitored with. This device’s latest software is from 2015, the device is past its end-of-life, so there is no cloud access anymore (APsystems moved to a new cloud provider), and certainly not local API access. To see the data for those panels I have access the ECU-3 locally via a browser on my network. This isn’t ideal as I want the numbers integrated into the overall picture for not just pretty graphs, but meaningful data that gives me an accurate picture of energy use. On the front “page” of the ECU-3 when accessed via a web browser, the numbers I wanted were there. The main one was the lifetime amount of energy. The lifetime amount was a large number, but that didn’t matter as the Energy dashboard in Home Assistant would basically track the differences hour-to-hour. This was how I was tracking on the SolarEdge-connected 24 panels was set up, so this is what I wanted for the ECU-3’s data.
In my day job as a security researcher and engineer - particularly when I worked for a company that wrote security vulnerability detection products - I’d often write up a proof-of-concept script or simple program and hand it off to what I’d deem to be a real programmer to make it nice and fit in with the rest of the overall product. I took the same approach here. As the main programming language in Home Assistant integrations are python, I wrote a simple python script to scrape the values from the ECU-3, so I knew it was easy enough to get to them. Granted I didn’t have a real programmer to hand this off to, so I wrote the actual Home Assistant integration myself.
Using my python script as a template, I wrote the integration over the course of a few nights. This was not easy as I was well out of my comfort zone. Coding in python is one thing, coding python in the environment that is Home Assistant is another. I googled for answers to errors and looked at numerous other integrations for ideas. Finally I had something written, integrated, and actually working. You can look at the source code here, it’s not anything spectacular but it allows me to add those 22 solar panels into the Energy dashboard so I get a combined and accurate value of solar panel energy in one place. Finally.
Of course I could have used Scrape, but I wanted to learn how to write an integration, mainly for future projects, possibly something in Phase Three. The APsystems integration project met that criteria as well.
Granted, this process made me realize something - the cloud presence was also being monitored by my solar vendor, who had on occasion contacted me and said “panel number X is not working, we’re sending someone out” and they’d repair some cable or something. Since the cloud presence is not there, they can’t do this. Additionally I am seeing via the graphs that these 22 panels are under-producing by comparison on the graphs to the other panels, more so than could be explained by the others numbering 24 extra and these 24 being slightly more powerful. This suggests that either I am having cable problems again (maybe) or that the PLC protocol communicating between the microinverters and the ECU-3 isn’t stable or reliable (much more likely). I’ve contacted my solar vendor - maybe it’s time to update those inverters and the ECU-3 to something more modern and reliable. If an upgrade happens it won’t be cheap as these were purchased with a 2-year warranty in 2017.
[Edit: At auto-publish time of this blog post, the microinverters, some of the cabling, and the monitoring device were upgraded. Early cloud monitoring shows this corrected production problems and increased output, but broke local monitoring. More in part three of this series in the future.]
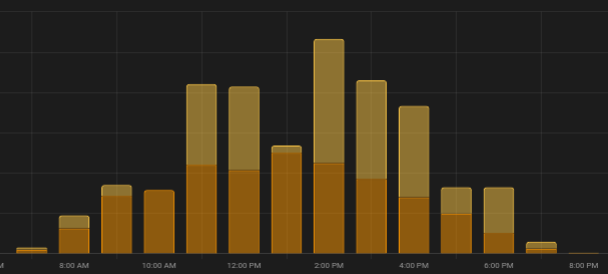
The yellow is the 22 panels monitored by the ECU-3. As you can see, on a cloudless day there are some inconsistencies.
Local Sol-Ark monitoring
Doing research on the Sol-Ark 15k inverter that the batteries were connected to, I knew that I didn’t want to scrape their cloud presence if I didn’t have to. I was familiar with Solar Assistant as a way to monitor everything via the inverter, but as I had multiple inverters the best I could hope for was local monitoring and gathering of values of just the Sol-Ark data - not the solar panels, and not the actual amount of energy being pulled from the grid as the Sol-Ark didn’t seem as accurate as the actual meter itself. However there was a way to integrate the Solar Assistant data into Home Assistant via MQTT. So that was the direction I decided to head.
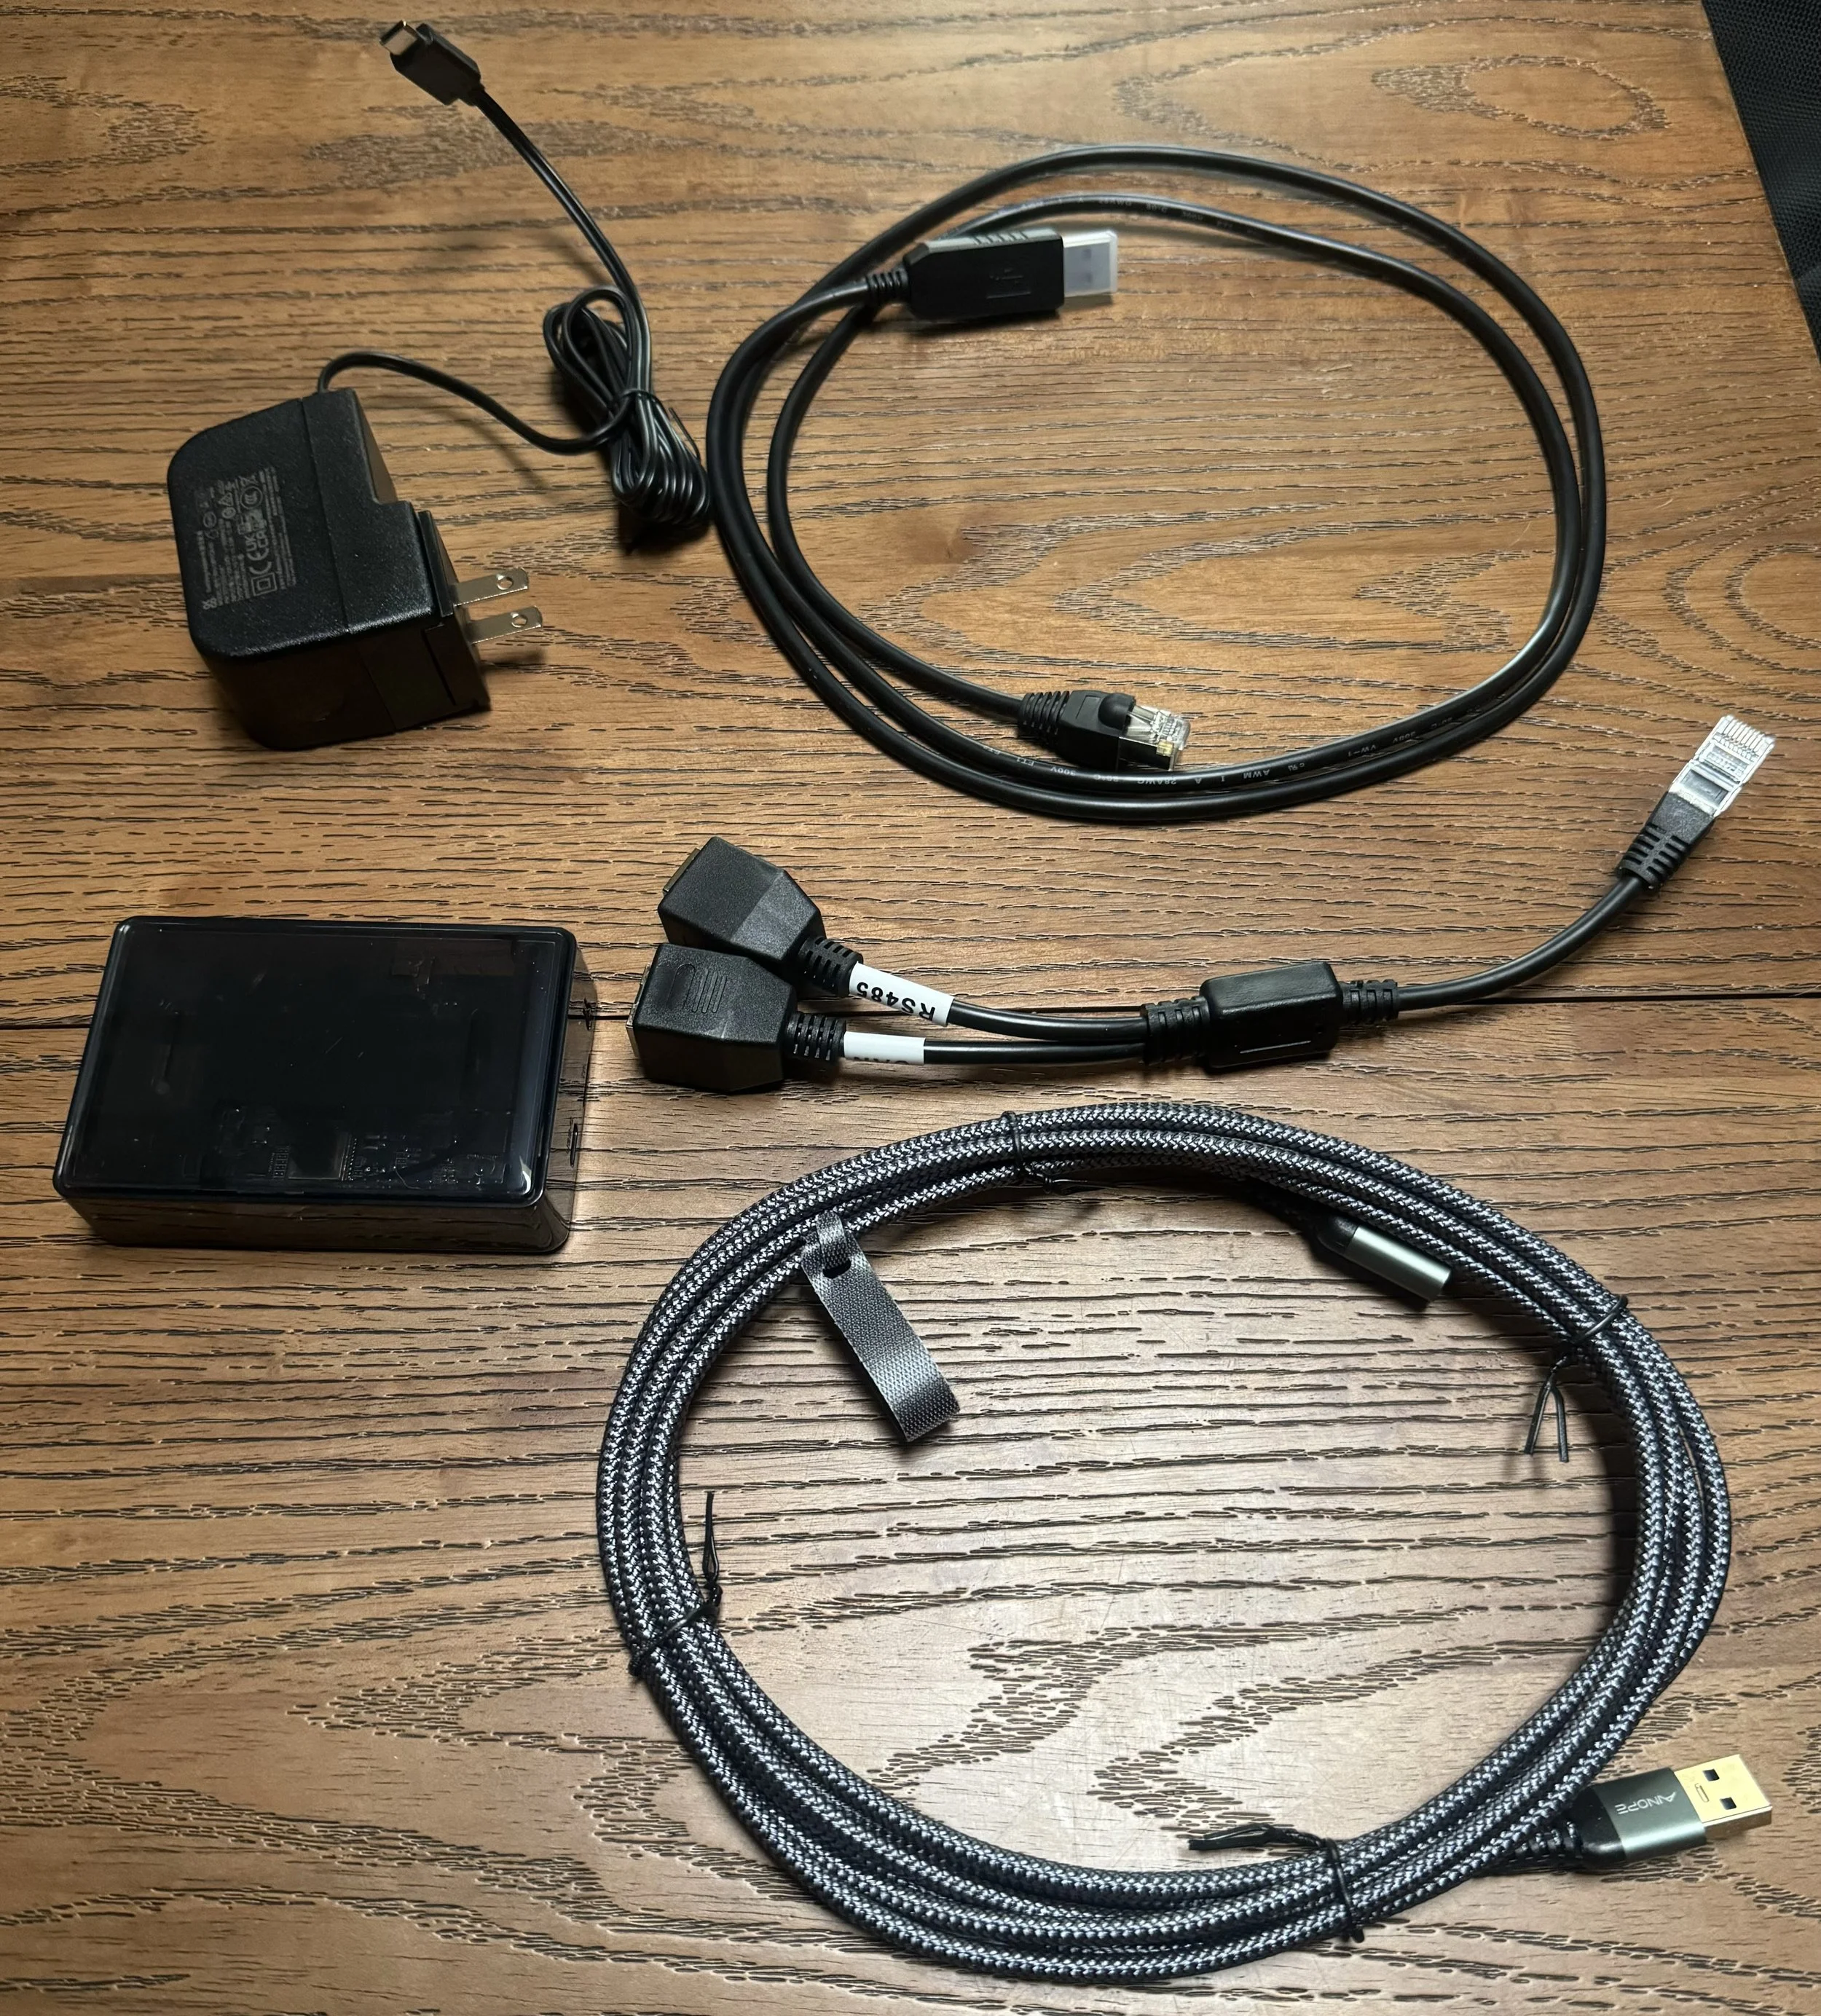
The Solar Assistant gear, consisting of an Orange Pi and cabling, including a USB extension.
The first problem I encountered was that I had no desire to mount an Orange Pi to run the Solar Assistant software on the outside of the house next to the Sol-Ark. Instead I decided I was going to run the RS485 to USB cable from the Sol-Ark to the server rack and the Orange Pi, as the server rack itself up against the outside wall where the Sol-Ark was mounted. I’d need a USB extension cable, but the overall distance was maybe 15 feet. Cabling the RS485 cable in was easy, the tricky part was getting the USB line into the house from the outside. I had elected to install a small junction box to make things a little neater and easier, and to allow for future expansion with other cabling for other separate outside projects.
There is an ancient window-unit air conditioner that kind of came with the house, and it is not used, but it sits on a reinforced wooden frame. I drilled a hole through that frame so I could install some conduit that could attach to the junction box. It provides enough access to handle several cables, and I’ll eventually use that to run cable to other devices.
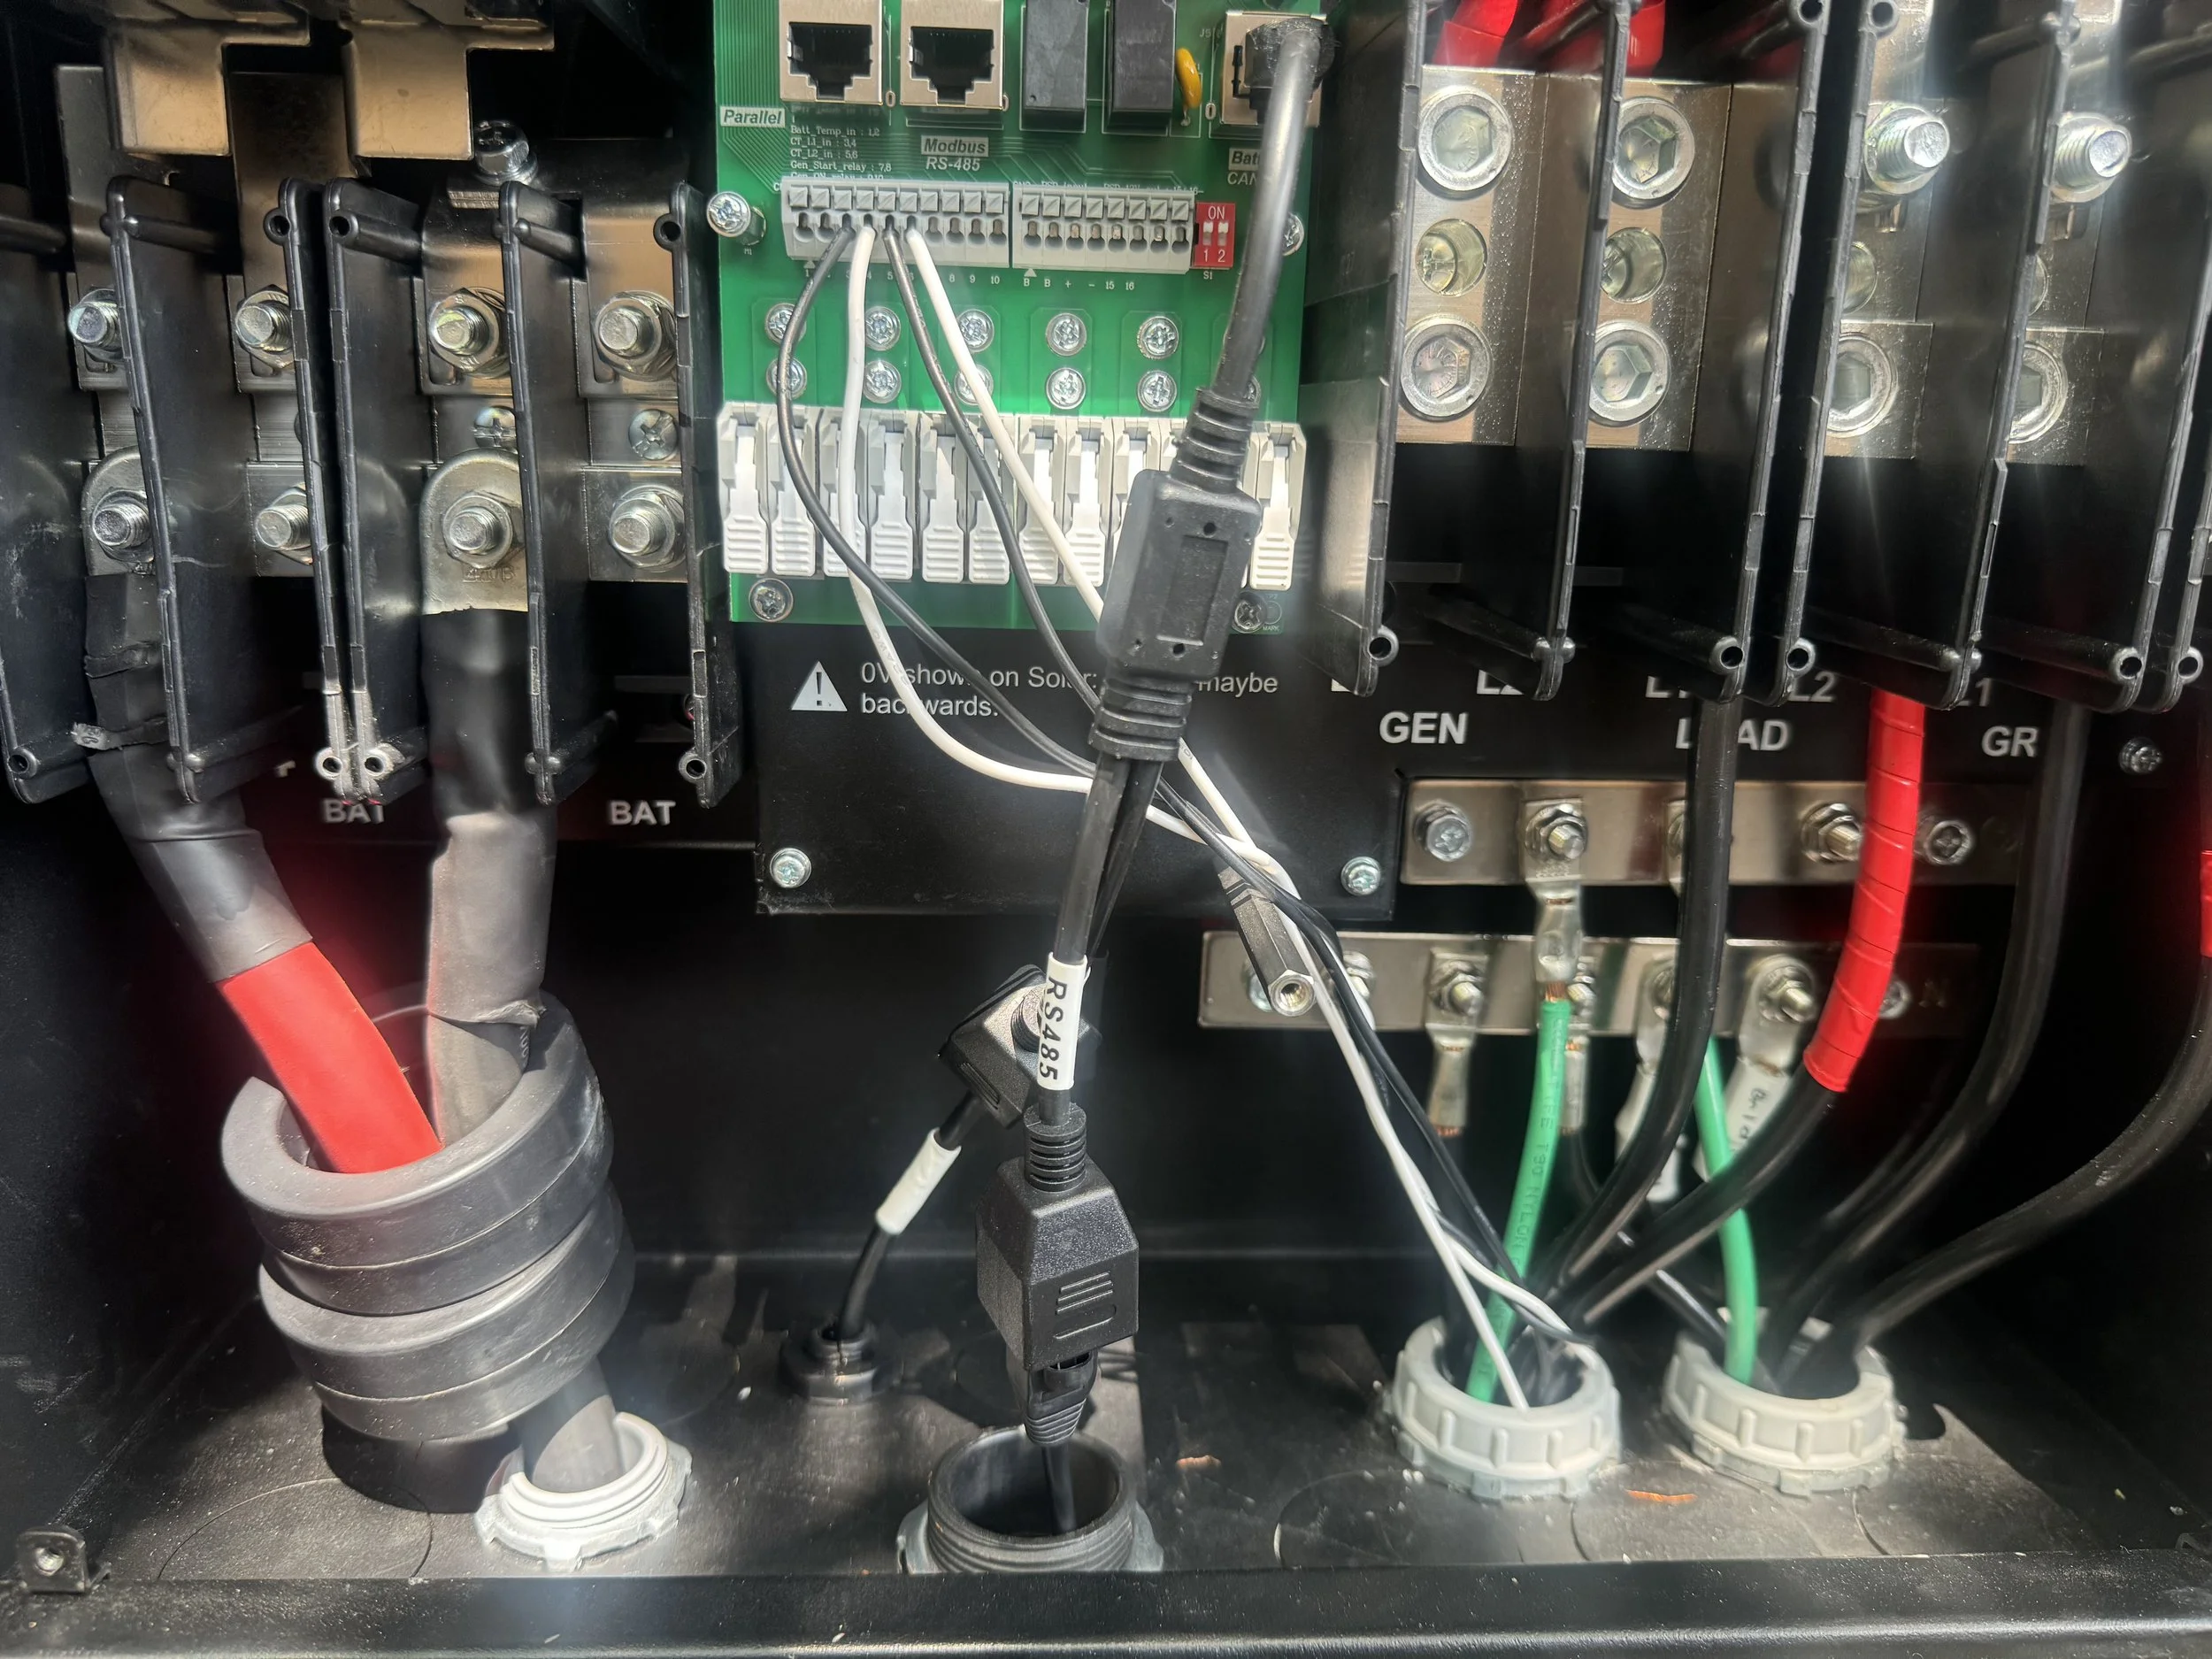
The CAN bus splitter, allowing access to the needed RS485 data.
Despite the Sol-Ark having an RJ45 jack labeled “MODBUS RS-485”, this would not allow for the monitoring needed. The CAN bus also had an RJ45 used by the batteries (via two of the eight wires in the jack), and the data I wanted (via three other wires in the jack) was going to come out of the same jack. Although I could have cabled it up myself, I went ahead and purchased a Y cable from Solar Assistant to cover this.
After examination of the Sol-Ark, it was clear that the unused punch-outs for running cables in and out of the inverter were mainly designed for larger cables, and all of the small cable punch-outs were already occupied. Therefore I simply used a larger one for my tiny USB cable, and due several factors (lack of readily-available reducing couplers, where I wanted my new junction box, existing conduits, how un-bendy the large conduit was) I had to install it in a weird loopy way. This also prevented potential USB cable interference from rather high-voltage conduit runs.
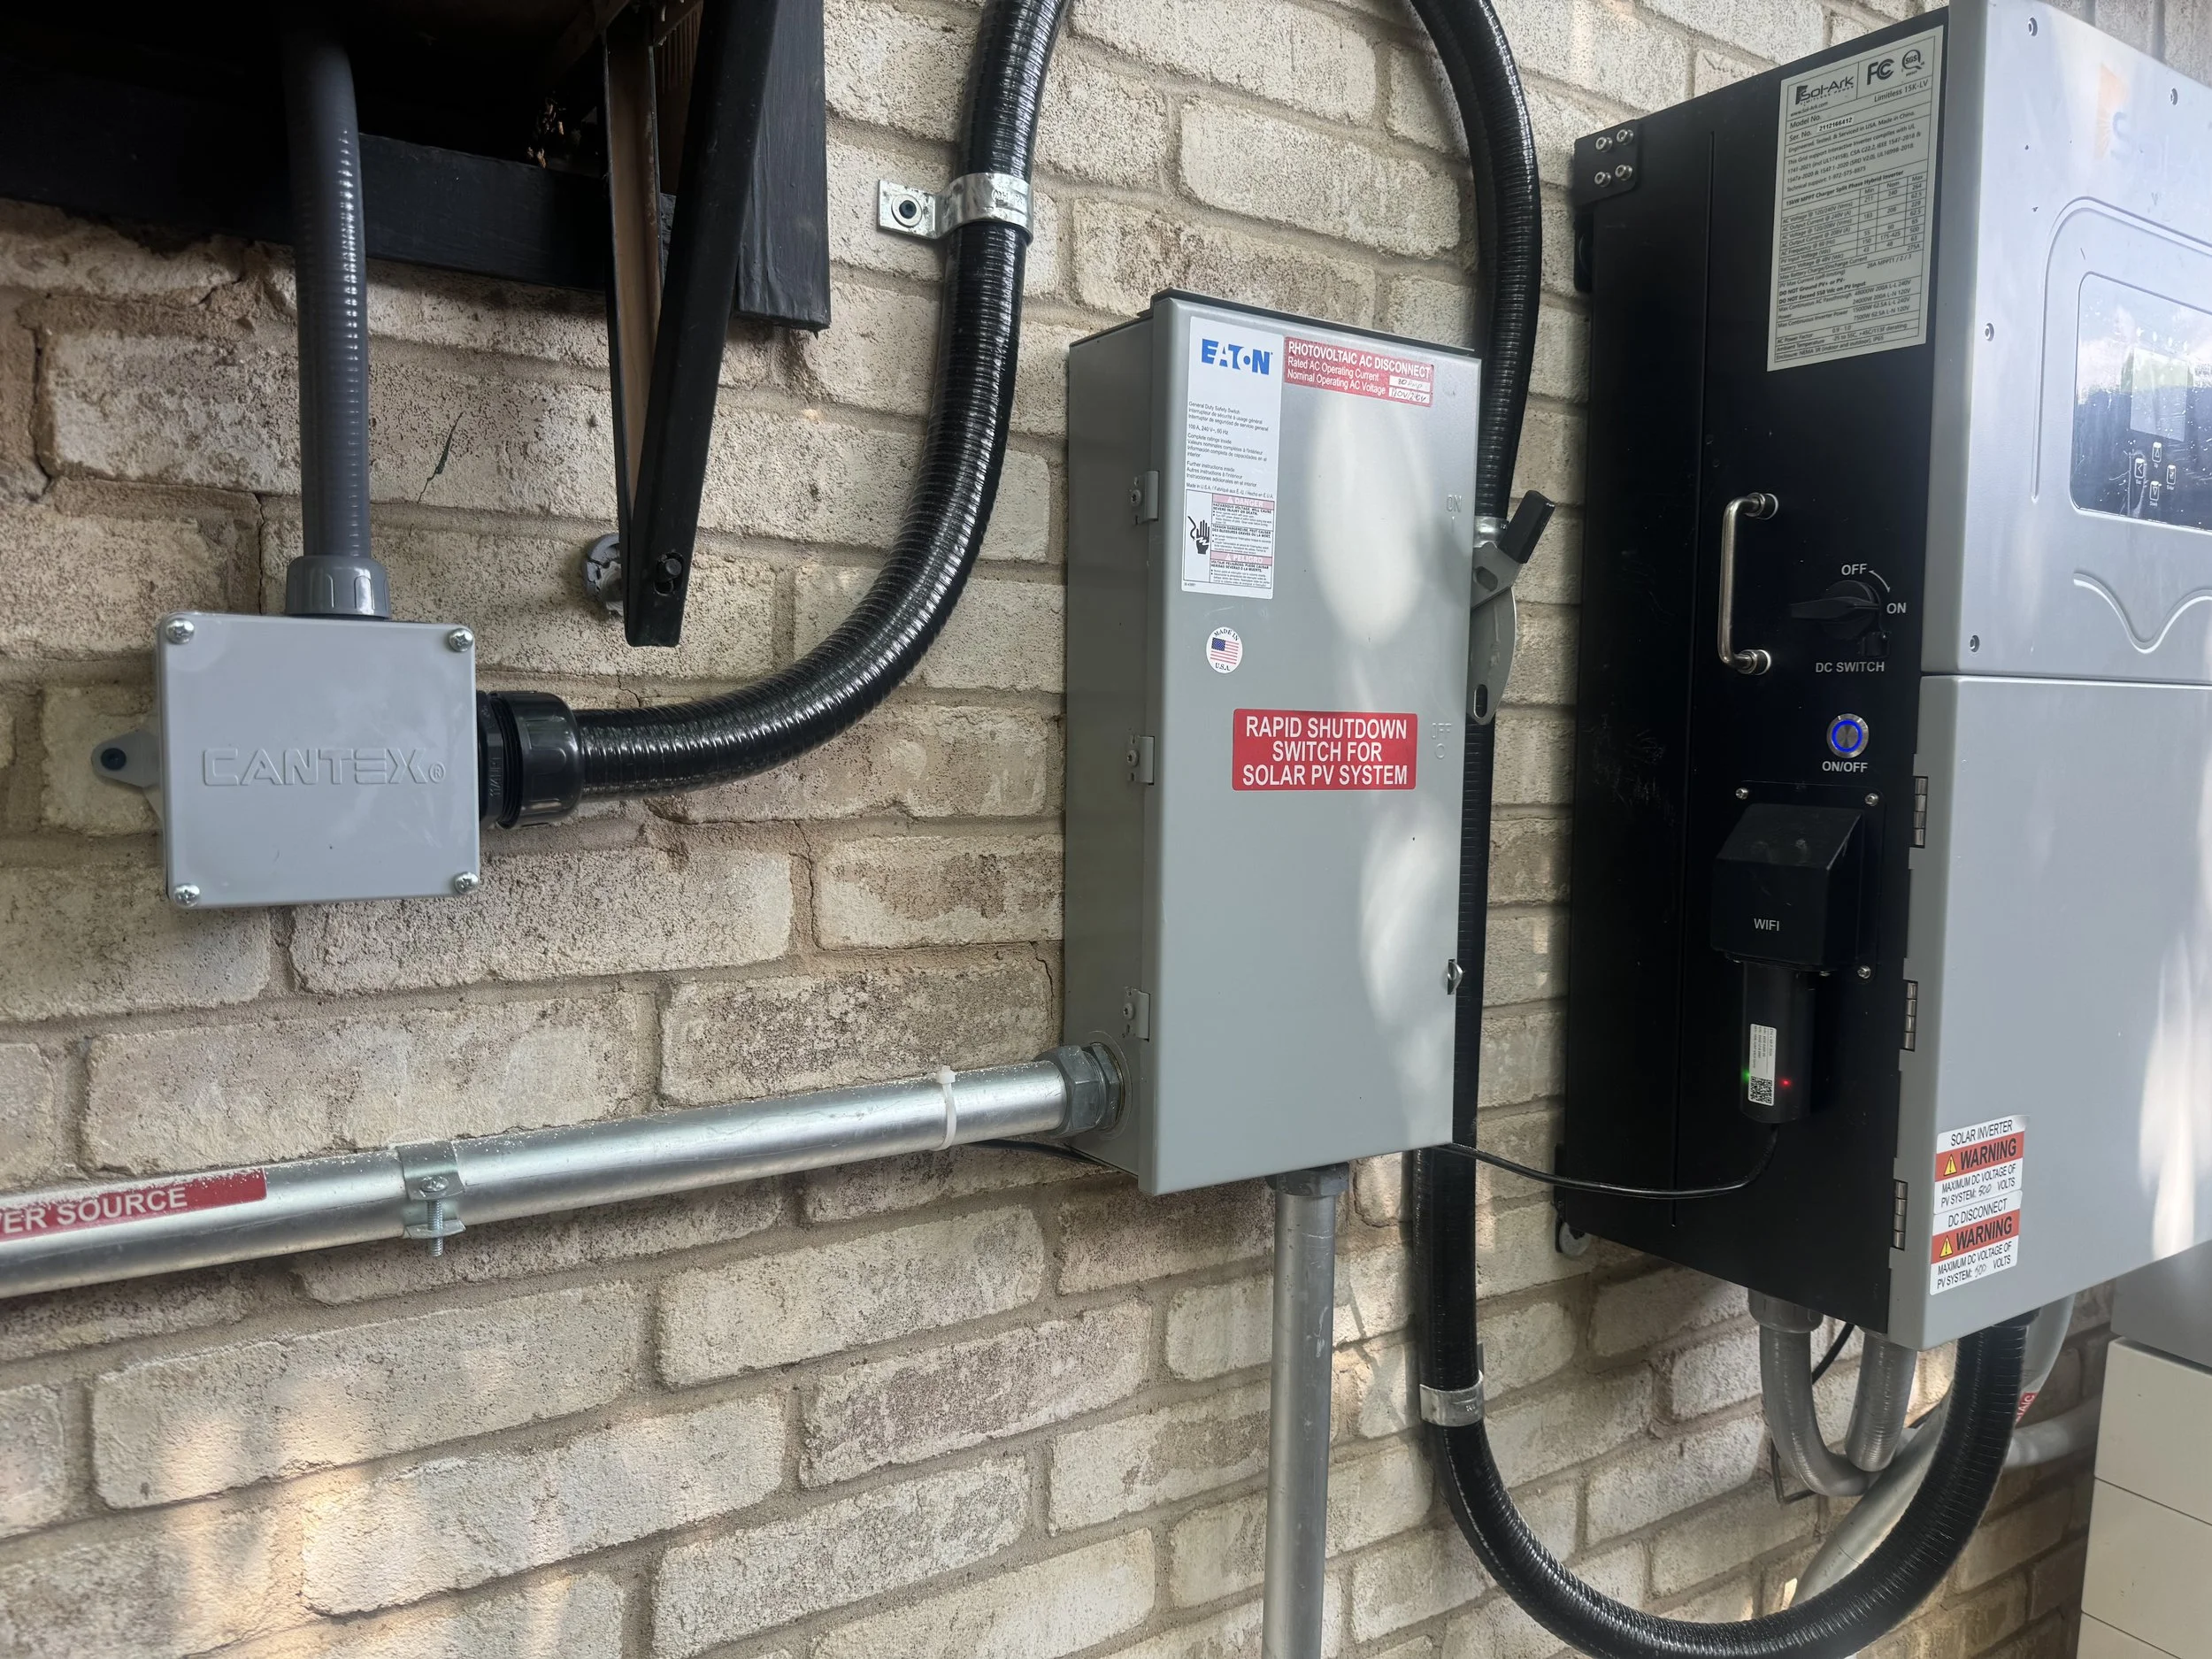
The big black conduit and the small grey junction box are helping me monitor the Sol-Ark 15k on the right.
Finally, I used the instructions off of the Solar Assistant website to set it up as an MQTT broker and then set up Home Assistant. I considered setting up Home Assistant as the broker on my network but since I was not using MQTT for anything else, this seemed quickest. Wrapping up with the Energy dashboard was quick, although I kept the Smart Meter Texas stuff there for “grid in” as it is more accurate.
General Thoughts
This isn’t ideal. SolarEdge used to allow local access, and a firmware update took that away, forcing cloud access. This particular model of SolarEdge does allow for Ethernet connectivity, but I have no guarantee that this will allow local access. Or I could look into its Zigbee traffic, as it does use that. Anyway, that’s all for Phase Three exploring. My electric meter also talks Zigbee, but the energy usage info I want to track is apparently encrypted and getting it is non-trivial. When getting the newer devices I’ve put an emphasis on connectivity to Home Assistant as a priority, and hopefully there is local access. In some cases there is both local and cloud access, but often it requires cloud access for the initial setup. Any local access is becoming rare - most everything is cloud-based. This is why I then go to the trouble to set up things like Solar Assistant so I can feed data from the Sol-Ark straight into Home Assistant. If the internet goes down I’m not screwed on monitoring the Sol-Ark via cloud only.
I am hoping that Phase Three will be easier. There are some large appliances I want to monitor and possibly control. Some of them will be easy, as they are simply dumb devices that can be monitored via a smart plug or some other in-wall or in-outlet device (which I have plenty of experience with). Other things, maybe not so much. We’ll see!

